Line Art Cut File In 10 Min
Hi creative queens!
For those of you who are new here, I am Saori and I offer free SVG on our website, Caluya Design.com.
If you need cute and trendy free SVG:
Download FREE SVG FROM HERE
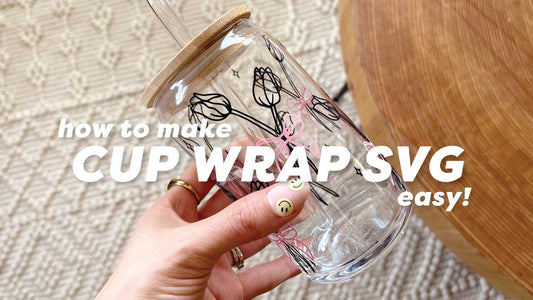
So today, we will be learning how to turn your precious photo into a line art cuttable file like this:

Have you noticed these line drawing is trending now?
I did some research and line art like this is super popular on Etsy.
If you learn how to do this, you may be able to start running your own custom t-shirt company for a side hustle!
Well, without a further due, let’s dive into it!
NOTE ✏️
The technique I am going to show you today is one of the many ways to make cut files.
I will be introducing many other ways on my blogs going forward, and today I’d like to share this very simple way that always works for me!
At the very end of this tutorial, I will share many suitable project ideas.
So make sure to stick around until the end.
THINGS YOU NEED 🤔
- iPad with Procreate App Installed
- Now, don’t get intimidated here. Many of you might be just starting out this Cricut journey, and trust me on this one- Procreate will expand your creative horizon and enable for you to create more personalized projects.
The best thing about procreate is that you can pay $4.99 once and the app is yours.
But unfortunately this app is only iPad Compatible.
- Apple Pencil
- You don't necessary need this, and also you can always buy cheaper alternative from Amazon!
- Cricut Design Space
- Also works with Cameo Silhouette Studio!
LINKS ⛓
☑️ STEP 1: Uploading Photo on Procreate
Assuming you have procreate downloaded, open the app > tap + sign on right top corner.
I want to make this as simple as possible for you to follow, so you can simply choose “screen Size” here.
Once you have done that, you will see a white blank page.
For this tutorial, I’d want to trace my own photo and create custom SVG.
So let’s add a photo here.
Tap wrench icon you see on the left top corner.
Then tap “Add” > tap “insert a Photo”.
Choose a photo you want to make SVG with.
Once you made your pick, the photo will show up on the blank page.
You now added a photo on your art board!
You will use it as a reference to make the line art.
Good job so far!
☑️ STEP 2: Get ready to draw
Let’s move on.
On your right top corner, you will see an icon with 1 square on top of another square.
This icon pr tab is called “layers”, go ahead and tap on the icon.
Now, the layer you have photo is called layer 1.
In the highlighted bar, there’s small “N”.
Tap it, and adjust “Opacity” down to about 40%.
After adjusting the opacity, tap the blue highlighted area to close the opacity editing tool.
Then, while having this layer section open, tap + within this bubble.
That will let you create a second layer, name Layer 2.
You are going to draw on this layer 2.
Why do we need to make a different layer?
Because let’s say you star drawing like this, and you don’t like how it turned out.
All you have to do is to go back to layer, delete layer 2, then restart again without messing the original photo!
☑️ STEP 3: Trace your photo
You are doing so great! And this is my favorite part.
Now, make sure you have layer 2 selected, and let’s tap the brush icon.
I usually like to choose brush that are solid, and easy to work with.
Here I am using "Monoline" under "Calligraphy".
By moving the bar on your right, adjust the brush thickness.
When you are ready, let’s start tracing.
Here’s few tips:
You can enlarge the canvas by using two fingers.
And don’t forget, you are going to cut this design at the end of this tutorial.
So make sure you are making thick enough line with solid line.
For this tutorial, I am staying using 1 color.
Now, I have traced my son’s photo, and I want to see how it look without the photo that I use as a reference.
For that, go back to the Layer, then uncheck the layer 1.
Unchecking will simply remove the visual of the layer, without permanently deleting it.
If you want to continue working, you can check the box again to make it visible.
But I love how it looks now, so let’s move onto taking this design into Cricut’s Design Space and making it cuttable!
☑️ STEP 4: Exporting your design
Now, open the Layers again and disable Layer 1 and Background Color.
You don’t want to include the original photo, and also want to export this design as a transparent background design.
Tap the Wrench icon again on your left top corner, then tap “share”.
Then, choose PNG only have the capability to save design with transparent background.
Here, I tap PNG, then the iPad will give you options to export.
Depending on what device you use for Design Space, this should vary.
I use Design Space on my lap top mainly, so I usually use Air Drop to transfer this design onto my Macbook.
If you have Design Space on the same iPad, you can save “as Image”.
☑️ STEP 5: Importing to Cricut Design Space
After successfully exporting the file, you can close your Procreate app.
Now, open Design Space app, and let’s make your design cuttable!
After opening the Design Space, click “Upload” and under “image”,
upload your design you just made.
Just choose “complex” then hit continue.
In the next step, you don’t need to do anything,
so just go ahead and hit Apply and continue.
Then I will go ahead and choose “cut image” here,
because I’d want to cut this design.
Then hit “upload”.
There you go! You now have your very own, custom cut file!
You can go ahead and cut vinyl to make decal, Heat Transfer Vinyl and create your own Sweatshirt or t-shirt. What makes making your own SVG so special is that this is one-of-a-kind, makes it so personal and adds such a special meaning to the project you’ll work on.
Now let me share pros and cons for this method that I shared today.
Pros:
- Perfect for creating drawing type of design
- Relatively easy to work with
- Drawing skill not required, only tracing
Cons:
- Not suitable method if you want to work with fonts (you can, but more knowledge and skills needed to do this with Procreate)
- You’d need an iPad
- Since we exported PNG and edited on Design Space, the design have to stay in the Design Space. If you wanted to save this as a SVG file, you’d have to find a different method to turn the exported file into SVG files. (which I’d love to show how here on our channel!)
Based on these Pros & Cons, I’d have 3 project suggestion!
PROJECT IDEAS 💡
1. Let your kids draw and turn it into vinyl decal
2. Turn your family photo into line art drawing and create custom t-shirt.
You can do this with your pet too!
3. Download commercial free photograph such as flower and create hand-drawn floral cut file for your craft project
What did you think of this cut file making method?
If you find it useful, my work here is done.
Happy crafting!
- Saori C.
